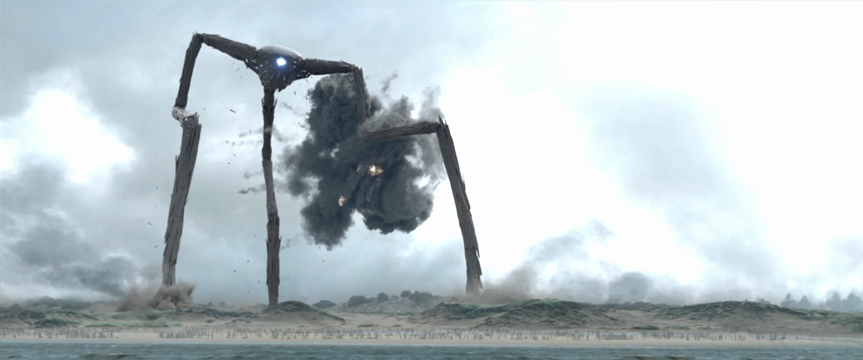
Creating 3D assets for your TV production

The creation and implementation of 3D VFX in a television show is a long and multi-faceted process. We have talked previously about the different areas this can encompass but even those articles were but brief dips into the deep pool of visual effects, creating 3D Assets for your TV production is no different.
One step we’ve mentioned previously is the creation of 3D assets. Believe it or not, this is a topic worthy of its own blog. There are many stages to creating a 3D asset before you have a fully formed, TV-ready model.
Planning
We won’t spend too long talking about this because we have recently written a blog about planning your VFX solutions, but it is still worth mentioning here. You can’t jump the gun and create a 3D model without first figuring out what is the best way of designing it and bringing it to life. If it is a character from an existing story or piece of IP, you may need to follow an existing design idea, or you may need to create something based on the underlying book or story. In the early stage of planning a CGI character model, it’s generally a good idea to start with some concept sketches so you can share these with key members of the team, including writers, showrunners, producers, directors, production designers, and your broadcasters and investors.
If the character is integral to your production – say if your main character is an alien – you will need to know where it will be and how it will move in a scene. You can use previs to help work this out, so when you film the scene you are framing correctly to allow for the character’s or model’s movement. From creating initial storyboards to previs, collaboration with a VFX studio will make this part a breeze.
Modelling
This is where the fun starts. Once you have agreed on what your character or other CGI model needs to look like, the first thing you need to do is create a basic model – a featureless grey sculpture that acts as a foundation for the stages to come. ‘Sculpture’ is very much an apt word; CGI modellers carve their model from a pre-existing 3D block as if they were Michelangelo himself.
Although this will need a lot more work before it looks like the final product, you can still use these basic greyscale versions of the character during the planning stage. Your chosen VFX studio can also put them into test plates so you can get an idea of how the model will look in the scene.
Texturing
This is the stage where your model starts resembling something. Texturing creates a flat, 2D image that you can apply to your model, giving it things like skin, clothes, or facial features.
This is where a lot of the realistic detail that brings your model or character to life will come from. Often, texture artists will use texture libraries of photo-realistic textures captured from real creatures, buildings, or vehicles to help them texture their models. Over the years, texturing has become more complex and detailed. Compare the models from the original Toy Story to 2019’s Toy Story 4 to see how far we’ve come. This has been driven by technology – as we are able to render more material to a higher resolution, we have been able to achieve more photo-realistic texturing.
Rigging
Now you have a fully detailed 3D asset, but it can’t do anything. Until you rig the model, it won’t have any joints and will be nothing more than a motionless statue.
Rigging is the process of creating a skeleton that allows the model to move. If it was for a human model, for example, it would detail the movement of the joints in places like the elbows and knees. This also includes rigging the muscles in the face so they can change their expression. Depending on the model, it will most likely have a unique skeleton that can be manipulated in the next stage.Riggers and animators study the skeletons and musculature of the animals and creatures that are going to be animated. If the creature is imaginary, they will study the skeletons and muscles of real creatures – for example, for a dragon, they might look at lizard, eagle, or bat skeletons
During the rigging stage, animators will look at reference footage of the creatures or vehicles who they are rigging to animate. They may also do tests of their own to replicate the movement of the creature.
Animating
This is where you actually make your model move. When you apply the rigged skeleton to your model, you can freely move it as you wish. Animating is the process of creating fluid movements that match you want it to do.
If the model needs to crouch, you can apply this to the skeleton. But animating will also take into account what changes in the model when it does this. How do other parts of their body move? How does the face change? The more realistic you want to be, the more fine details there will be.
Lighting
At this point, you will have a fully finished model. But to correctly integrate it into your footage it has to look like it belongs. This is where lighting, shadows, and shaders come in.
If you are working on a fully CGI scene or project, the lighting will all be created in CGI by Lighting artists. If your model or character is being incorporated into live action plates, then compositors will take the model and the lighting created by 3D Lighting artists to then incorporate into the shot.
If you are putting your new model into real-life footage, you will need a lighting system that mimics the one from your shoot. That means the model has to be illuminated from the same angle and shadows have to fall in the same way real objects’ and actors’ shadows do. The better the lighting, the more your asset fits into the scene.
And the rest
When you’ve done all of this, all that’s left is to render it out and composite it into the scene. Rendering can take hours depending on the detail of the model and is very much a hands-off process – just let the computer do its thing. Compositing takes your 3D assets, the real-life footage, and any other elements and puts them all together.
There are sometimes strong differences of opinion between 3D artists (so animators and modellers) and 2D artists (compositors and VFX Supervisors) about whether it is more important to favour the lighting conditions created by the 3D team or whether the 2D compositor and team should be allowed to light the 3D asset. 3D artists are sometimes said to favour lighting their models to show showcase them, whereas 2D artists can place much of their emphasis on ensuring the model beds into the live action plate and looks as photo- real as possible.
If you are working on a production that is mainly or completely CGI, then you will need to work in a full CGI lighting workflow. If you have large rendering capacity, there are benefits to using a CGI lighting workflow if you have lots of models that need to be incorporated into live action plates.
Creating 3D assets may sound like a complicated and arduous process, but in the right hands, it can be simple and streamlined. It is likely the VFX company will have experts solely dedicated to each stage, which means you end up with the best final result. The key is to work with a studio that has the experience to make the process as smooth for you as it is for them.
REALTIME is one such studio. Our work speaks for itself. If you would like to talk about your next project, feel free to get in touch with me at [email protected].


