fbpx

Creating 3D assets for your TV production

The creation and implementation of 3D VFX in a television show is a long and multi-faceted process. We have talked previously about the different areas this can encompass but even those articles were but brief dips into the deep pool of visual effects, creating 3D Assets for your TV production is no different.

One step we’ve mentioned previously is the creation of 3D assets. Believe it or not, this is a topic worthy of its own blog. There are many stages to creating a 3D asset before you have a fully formed, TV-ready model.


Planning

We won’t spend too long talking about this because we have recently written a blog about planning your VFX solutions, but it is still worth mentioning here. You can’t jump the gun and create a 3D model without first figuring out what is the best way of designing it and bringing it to life. If it is a character from an existing story or piece of IP, you may need to follow an existing design idea, or you may need to create something based on the underlying book or story. In the early stage of planning a CGI character model, it’s generally a good idea to start with some concept sketches so you can share these with key members of the team, including writers, showrunners, producers, directors, production designers, and your broadcasters and investors.

If the character is integral to your production – say if your main character is an alien – you will need to know where it will be and how it will move in a scene. You can use previs to help work this out, so when you film the scene you are framing correctly to allow for the character’s or model’s movement. From creating initial storyboards to previs, collaboration with a VFX studio will make this part a breeze.


Modelling

This is where the fun starts. Once you have agreed on what your character or other CGI model needs to look like, the first thing you need to do is create a basic model – a featureless grey sculpture that acts as a foundation for the stages to come. ‘Sculpture’ is very much an apt word; CGI modellers carve their model from a pre-existing 3D block as if they were Michelangelo himself.

Although this will need a lot more work before it looks like the final product, you can still use these basic greyscale versions of the character during the planning stage. Your chosen VFX studio can also put them into test plates so you can get an idea of how the model will look in the scene.


Texturing

This is the stage where your model starts resembling something. Texturing creates a flat, 2D image that you can apply to your model, giving it things like skin, clothes, or facial features.

This is where a lot of the realistic detail that brings your model or character to life will come from. Often, texture artists will use texture libraries of photo-realistic textures captured from real creatures, buildings, or vehicles to help them texture their models. Over the years, texturing has become more complex and detailed. Compare the models from the original Toy Story to 2019’s Toy Story 4 to see how far we’ve come. This has been driven by technology – as we are able to render more material to a higher resolution, we have been able to achieve more photo-realistic texturing.


Rigging

Now you have a fully detailed 3D asset, but it can’t do anything. Until you rig the model, it won’t have any joints and will be nothing more than a motionless statue.

Rigging is the process of creating a skeleton that allows the model to move. If it was for a human model, for example, it would detail the movement of the joints in places like the elbows and knees. This also includes rigging the muscles in the face so they can change their expression. Depending on the model, it will most likely have a unique skeleton that can be manipulated in the next stage.Riggers and animators study the skeletons and musculature of the animals and creatures that are going to be animated. If the creature is imaginary, they will study the skeletons and muscles of real creatures – for example, for a dragon, they might look at lizard, eagle, or bat skeletons

During the rigging stage, animators will look at reference footage of the creatures or vehicles who they are rigging to animate. They may also do tests of their own to replicate the movement of the creature. 


Animating

This is where you actually make your model move. When you apply the rigged skeleton to your model, you can freely move it as you wish. Animating is the process of creating fluid movements that match you want it to do.

If the model needs to crouch, you can apply this to the skeleton. But animating will also take into account what changes in the model when it does this. How do other parts of their body move? How does the face change? The more realistic you want to be, the more fine details there will be.


Lighting

At this point, you will have a fully finished model. But to correctly integrate it into your footage it has to look like it belongs. This is where lighting, shadows, and shaders come in.

If you are working on a fully CGI scene or project, the lighting will all be created in CGI by Lighting artists. If your model or character is being incorporated into live action plates, then compositors will take the model and the lighting created by 3D Lighting artists to then incorporate into the shot.

If you are putting your new model into real-life footage, you will need a lighting system that mimics the one from your shoot. That means the model has to be illuminated from the same angle and shadows have to fall in the same way real objects’ and actors’ shadows do. The better the lighting, the more your asset fits into the scene. 


And the rest

When you’ve done all of this, all that’s left is to render it out and composite it into the scene. Rendering can take hours depending on the detail of the model and is very much a hands-off process – just let the computer do its thing. Compositing takes your 3D assets, the real-life footage, and any other elements and puts them all together.

There are sometimes strong differences of opinion between 3D artists (so animators and modellers) and 2D artists (compositors and VFX Supervisors) about whether it is more important to favour the lighting conditions created by the 3D team or whether the 2D compositor and team should be allowed to light the 3D asset. 3D artists are sometimes said to favour lighting their models to show showcase them, whereas 2D artists can place much of their emphasis on ensuring the model beds into the live action plate and looks as photo- real as possible.

If you are working on a production that is mainly or completely CGI, then you will need to work in a full CGI lighting workflow. If you have large rendering capacity, there are benefits to using a CGI lighting workflow if you have lots of models that need to be incorporated into live action plates. 

Creating 3D assets may sound like a complicated and arduous process, but in the right hands, it can be simple and streamlined. It is likely the VFX company will have experts solely dedicated to each stage, which means you end up with the best final result. The key is to work with a studio that has the experience to make the process as smooth for you as it is for them.

REALTIME is one such studio. Our work speaks for itself. If you would like to talk about your next project, feel free to get in touch with me at [email protected].

2D vs 3D VFX solutions for your TV production

There are very few productions today that don’t use some kind of VFX. It has become an everyday facet of TV and movie production. And, to the uninitiated, the plethora of jargon can be confusing. Something in particular that comes up often is 2D vs 3D VFX.

On the surface, it sounds like 2D is akin to cartoon animation and 3D is more Pixar-esque CGI. But this couldn’t be further from the truth. When we talk about 2D or 3D VFX solutions, we’re talking about techniques that can be accomplished in either a 2D or 3D space. Still confused? Let’s explore the topic further…


2D vs 3D VFX Solutions

In reality, this isn’t an issue of one versus the other. Both 2D and 3D solutions have their place in the VFX world. There will be some instances where all you need is to use some 2D techniques, such as a 2D matte painting, to add to the scene. Other times, you’ll need an entire 3D model for your production. And sometimes you’ll need to use both at once.

As you can probably guess, 2D effects work in a 2D space, which means there isn’t any “depth” or “dimension” to it. They’re useful if the camera is moving on an X and Y axis (left and right and up and down). 3D, on the other hand, adds more depth to the shot and are used when they’re likely to be front and centre and under more scrutiny. So 3D visual effects are more often used to create CGI characters or other objects (such as vehicles, planes, or spaceships) that are integral or important to the story being told.


2D

Let’s go into more detail about some of the more common 2D VFX solutions and techniques.

Matte painting

Matte paintings are one of the oldest techniques in the book. In the past, they used to be painted onto glass. Today, we can use digital painting software to create something that looks incredibly realistic. Often 2D matte paintings can be created using still images or elements from still images. However the effect is accomplished, the goal is the same: to create a convincing background for the shot.

Beauty and de-ageing

2D paint techniques can be used to remove blemishes, bags, and wrinkles on actors but also to age actors or make them look younger or older. Increasingly actors are being aged and de-aged to help tell stories cover long time periods.

Crowd replication

2D compositing can be used to create crowds for indoor and outdoor scenes. By shooting plates with a relatively small number of extras, a relatively empty cinema, theatre, or football stadium can be made to look full. 

Muzzle flashes 

These are a staple of many TV shows and films and are easily achieved using 2D visual effects. If suitable elements can be sourced, almost any kind of weapon or artillery can have a muzzle flash and smoke added.

Blood and gore

Many shows require blood or gore to be either added or enhanced to actor’s faces and bodies. In most instances, with good elements, this can be achieved with 2D effects.

Tracking

Tracking in a 2D sense is about following objects on-screen on the X and Y axes. With 2D tracking, you’re likely to be following a number of points in the image, something which can be made easier by placing dots or tracking markers during filming.


3D

3D VFX haven’t been around as long as some of the techniques used in 2D VFX, but you can achieve everything that can be done in 2D with 3D. Here are some common 3D VFX solutions:
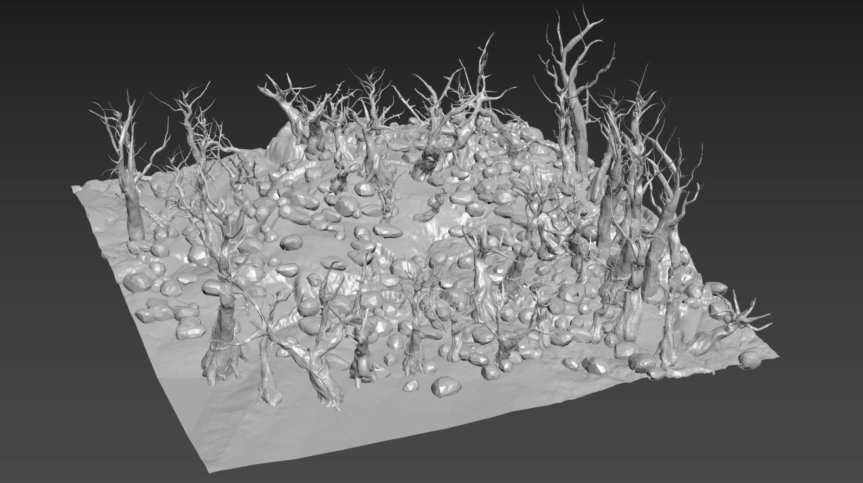
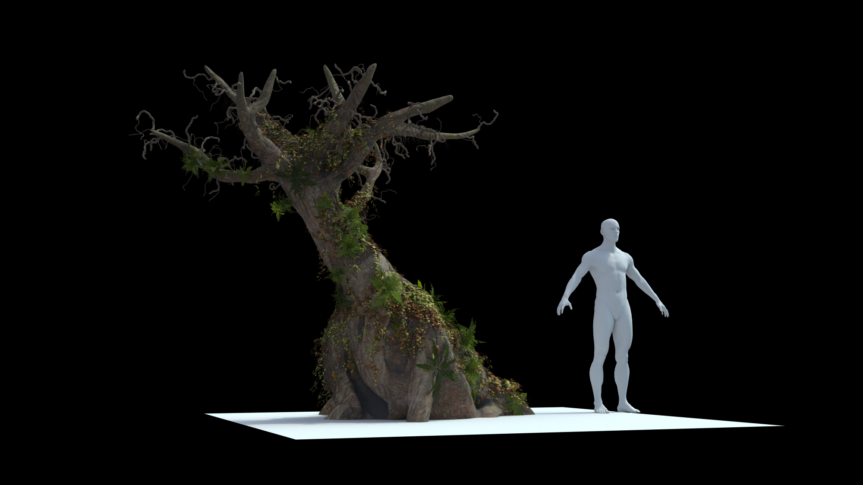
Assets

Your CG assets will most likely be 3D. They will need to blend into the scene so need to appear as if they are at home in a 3D space. In today’s world, even the most innocuous of items will be CG assets. It could be a giant spaceship, or it could be a futuristic gun. It could even be a cardboard box if you need it to be.

Match moving

This is another term for 3D tracking. It involves extracting the camera movements from the live-action shoot and replicating it in a CG environment. There was a time where this process was laboriously done by hand but with advances in post-production software, this is much simpler. This is a necessary process if you want any 3D assets to move with the shot as if it was always there.
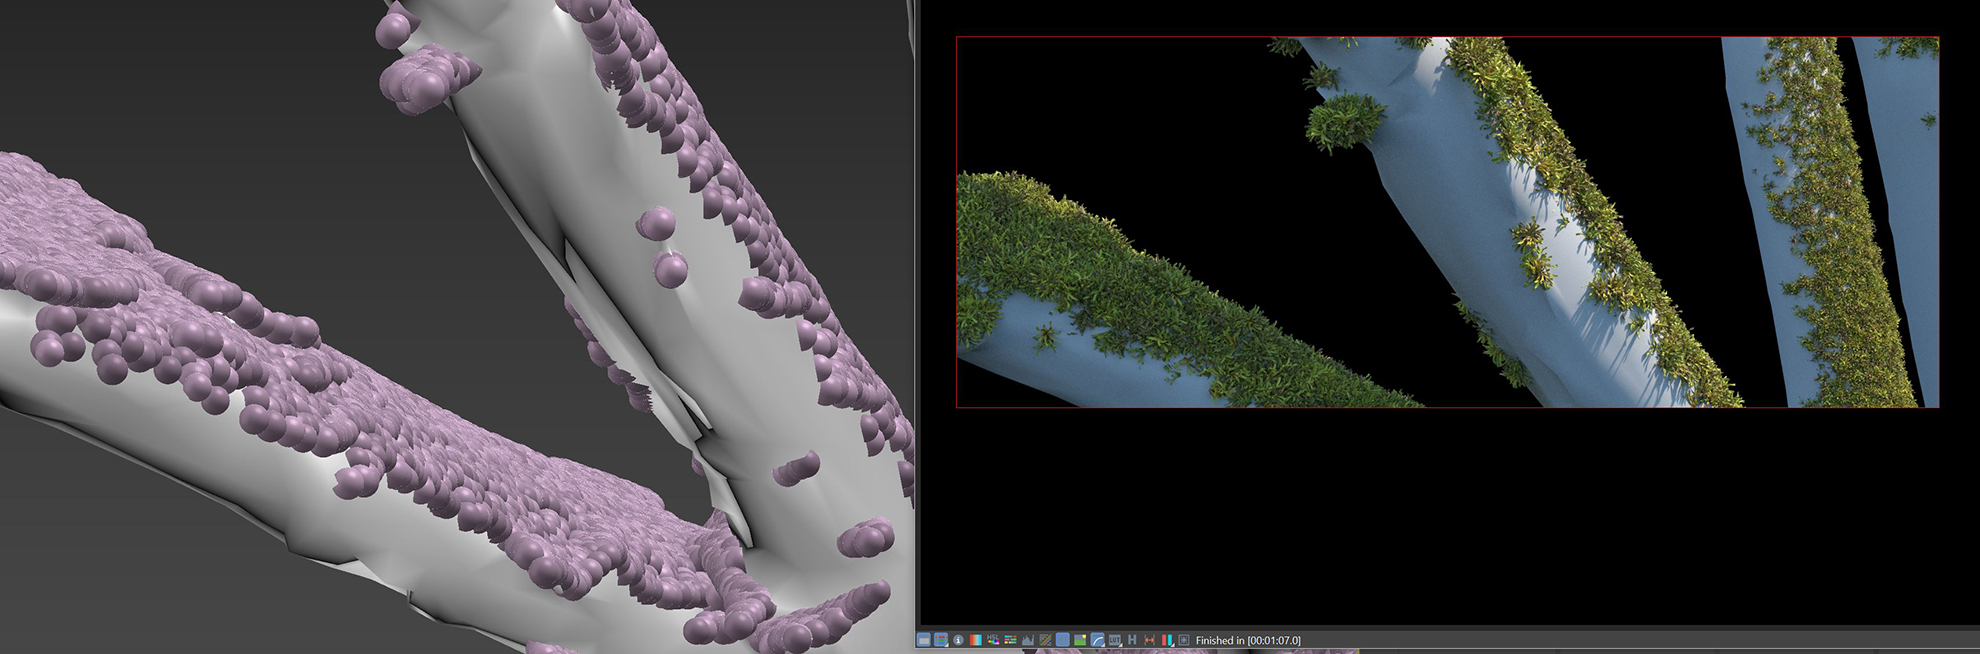
Particle effects

When you need to go even smaller, you can use particle effects. These can be added after filming to prevent them from being cumbersome for your actors. So if you have a fire in a scene, you can create realistic-looking smoke or embers. If it’s supposed to be a winter scene, add snow. Is it raining? You can create individual raindrops. Modern systems are capable of creating particle effects that appear and disappear over time, as they would if they were real.

Lighting

This is used in tandem with your 3D assets. To make them look as if they are actually in a scene, the lighting and shadows need to match the environment around them. It also adds depth and helps cement the asset in the scene.
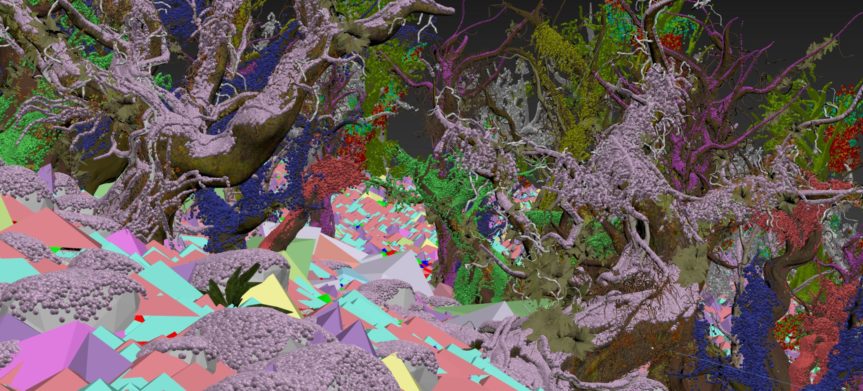
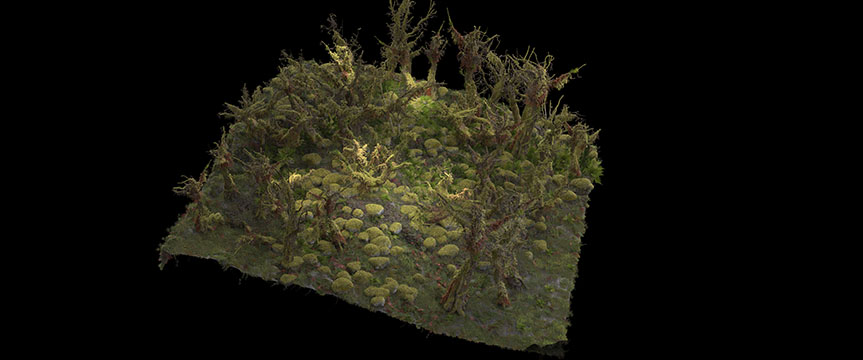
3D matte painting

You aren’t seeing things – matte painting is in both the 2D and 3D section. A growing area in 3D VFX, 3D matte paintings are a way of creating a 3D environment illusion by creating a layered digital painting. In the past, they would layer different panes of glass, but now we can use digital programs to create simple 3D geometry that matches the environment. It saves you the effort of creating incredibly detailed 3D models if the shot doesn’t call for such level of detail.

2D and 3D

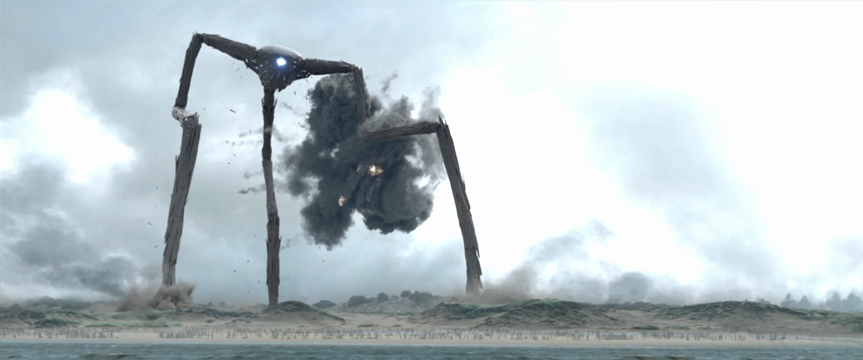
All of these techniques are integral to post-production VFX. Different situations will call for a mixture of them all. Maybe you need a matte painting to show a war-torn London in the background while your 3D alien wreaks havoc in the foreground.

While most shows will require some 3D VFX, the majority still use 2D visual effects for their shots. The amount of 3D you have versus 2D will depend on your budget and the time available. If you project has lots of 3D elements – such as characters, assets, or even environments – you will need more time and budget to achieve them

What solutions you need will depend entirely on your individual circumstances. Today, it is much cheaper and quicker to use VFX to solve any problems you have.

If you need a VFX company to support you during your production, look no further than REALTIME. You can see our impressive CGI work in the upcoming BBC adaptation of War of the Worlds. If you would like to know more about what we can do for you, or if you’d like advice on 2D vs 3D VFX get in touch with me at [email protected].

tyFlow Test

Our hugely talented Artist Danilo Lombardo has been testing some new tools that have caught our attention, tyFlow in particular got an amazing result.

Lucky for us he’s done a lovely little write up… take it away Danilo!

This scene started as an experiment, with the mossy forest of Wistmans Wood , in Devon, England, as our main reference.
A scene like this relies on some little but crucial fundamentals.

The main objective was to create a scattering system that could be manipulated and art directed while creating an interesting chaos throughout the scene.
In doing this, it’s really beneficial to come up with a hierarchy of growth that can be repeated across, and that helps us define the visual pattern for the elements.

In our scene we defined some elements that would act as main surfaces while the rest would simply grow on top and dress it.
These elements were the terrain, rocks and trees.

The first area is the terrain, that was achieved using Gaea powerful node based system and then exported as geo. The terrain was then scattered with rocks and trees using forest pack to have a fast random distribution , keeping a low poly version of those elements that would later serve as scatter base for all the vegetation.

The base layout is quite simple.

Realtime tyFlow test

Trees and rocks were sculpted using zbrush and textured using substance painter, following a pretty standard approach for this kind of objects, always having the gnarly dwarf oak trees
from Wistmans Wood as a goal.

Only 5 different variations of rocks and trees were sufficient for having enough visual noise in the scene. Some smartmaterials such as moss and tree bark were developed in substance to be easily instantiated on all elements. The vegetation in the scene is a mix of megascan assets plus some additional ones obtained using textures atlases from textures.com mapped on simple planes. Every final tree is then converted to a vrayproxy and placed in the scene.

[All the trees are sculpted in zbrush and then dressed with vines , plants and leaves using zbrush fibermesh and tyFlow. The plugin “ultimate painter” was used to place some of the objects manually.]

Realtime tyFlow test

The real fun starts with the infinite possibilities that scattering brings to the table. Forest pack was used on the ground, from small grass to bigger plants, using textures to drive the distribution and using the powerful forest material to colourise those assets.

The rest of the scattering was handled by tyFlow in order to test its capability. Although being mainly a tool for FX artists, I was blown away by the possibilities for environment artists alike. I have always been a fan of using particle flow in max for certain tasks, and tyFlow have the amazing ability of scattering a crazy amount of points to any surface and gives artist a lot of freedom in what to do with those points.

I’ve been able to create a moss system that would just work on every asset in the scene, and can be reused even in future projects. Particles are being born on objects using a position object operator, which has now been improved to take in account objects normals, material IDs and textures to drive the density of those points. Points are then converted to moss , using a shape operator with the out of the box “grass clumps” 3D template present in the shape node.

[particles are scattered on the objects using the z-axis to drive their placement. Each particle is converted to a grass clump at render time.]

Realtime tyFlow test

This simple setup was all I needed to literally cover the entire scene in moss, with a display node set as “sprite” that kept the viewport extremely fast.
tyFlow was used to scatter all the moss plus many other smaller items like twigs on the rocks etc. and it proved to be a trustful help when it comes to scatter and art direct a huge number of points in the scene, without ever leaving max.

I was able to texture my moss using different custom V-Ray materials assigned to particle ID groups. A mesh operator then told V-Ray to treat each strand of moss a V-Ray instance.
tyFlow is fully compatible with V-Ray and is also able to output V-Ray proxies. Final lighting and fog were handled in V-Ray.

The final scene is quite light considering the amount of details involved. Different colours were used for different tyFlows.

Scattering and dealing with huge number of points is vital in 3D environments production, from creating garbage on the ground and piling of objects in a natural fashion,to parametrically dress a shelf full of items without having to do it manually to creating more complex setups with destruction in order to model decaying structures, the possibilities are endless.

I’m really excited about tyFlow and the power it brings to 3dsMax.

Here’s a little breakdown showing different stages of growth.

We have lots of lots of top tips in our insights take a look!


TV VFX for dummies

Welcome back to part two of our ‘VFX for dummies’ series! We know you could be a veteran of the industry but still be unsure about this rapidly changing field of TV production. What CGI and VFX are might not be immediately obvious to you. So if you’ve ever tried to research the topic to gain a clearer understanding, you might have left more confused than before.

Like any highly technical specialisation, VFX has its own dictionary of industry terms that can – on the surface – appear confusing. But we’re here to demystify some of the most common terms and break them down for you.

TV VFX

8-bit/16-bit

This refers to the bit depth of your footage, i.e. how much colour information is stored in your imagery. The more colour information it has, the more colours you have available. The higher the bit depth, the more colours it can store. This term is common when discussing concepts like ultra-high-definition (UHD) or high dynamic range (HDR).


Assets

These are your 3D models – what you might think of when you think ‘VFX’. They can be as large or small, or as noticeable or inconsequential as you want. It can be anything from a plane to a three-legged war machine, a tree to an animal, or a box to an even smaller box.


CGI

Computer-generated imagery. As the name suggests, these are the visual elements of your production that are created on a computer. Often used to refer specifically to 3D Computer Animation or as another term for Visual Effects or VFX. CGI and VFX are not the same though. CGI – and its integration – can be considered part of the VFX process.


Compositing

The combination of at least two source images to create a new integrated image. Compositing happens  when you put all your different ‘elements’ together – your 3D assets, your backgrounds, your particle effects, and your actual on-set footage.


EXR

See OpenEXR.


High dynamic range (HDR)

This is a common term used in relation to next-generation TV’s which can deal with a larger than normal dynamic range. Dynamic range relates to the brightness values in a scene or image, from brightest to darkest, often expressed as a ratio. In a digital image, it also relates to the total number of different colours in the image. Streaming content providers like Netflix and Amazon have spearheaded the drive in the industry to deliver films and series to HDR standards. 


Keying

Keying is the process of algorithmically extracting an object from its background and combining it with a different background. To help with this process, productions use a ‘green screen’ or ‘blue screen’ to shoot against. This is used so, during the keying process, you can cut out the green or blue colour and insert your own background digitally. Ideal in situations where a location does not exist so needs creating (such as an alien planet) or where it is too dangerous to have the actor in that situation (such as in a special effects explosion).


Matte painting

From the small to the large, sometimes you need to create entire landscapes. You may be able to use a matte painting, which is a 2D, digitally drawn background that can be added to your scene. Before digital production became the industry standard, matte paintings were painted onto glass. The paint techniques used now are created using software like Photoshop, Nuke, Mari, and ZBrush.


OpenEXR

This is a specific image file format designed for use with High Dynamic Range (HDR) imagery.


Parallax

Parallax is defined as the perceptual difference in an object’s location or spatial relationship  when seen from different vantage points. Parallax is an effect which can be used to add more depth to 2D shots. You can adjust focus and depth of field to make certain elements appear closer to or further away from the camera, adding depth to a 2D shot.


Particle system / particle effects 

A 3D computer graphics technique that is used to create a large number of objects that obey well-defined behavioural rules. Useful for controlling multitudes of discrete objects, such as asteroids or flocks of birds, but also as a tool for creating natural phenomena such as fire, smoke or water. Particles are small 3D elements that add tiny details to a shot. If there’s a fire, you’ll need rising embers and smoke. If there’s rain, you’ll need small droplets.


Pipeline

A pipeline is the generic term used to describe a set of processes for achieving a certain result. It is most commonly used to describe the VFX pipeline. The VFX pipeline covers all the processes from pre-production through to post-production and delivery. It involves many things in this glossary, including previz, matte painting, and tracking. Creating a robust and efficient pipeline is a key part of developing a successful VFX company.


Previz (abbreviation for previsualisation)

Previs is a collaborative process that generates preliminary versions of shots or sequences, predominantly using 3D animation tools and a virtual environment. Previs is used by filmmakers to explore creative ideas, plan technical solutions to shooting, and to help the whole production team visualise how finished 3D elements will look in the final project ahead of final animation being completed.


Rotoscoping

A rotoscope was originally the name of a device patented in 1917 to aid in cel animation. It is now used as a generic term for ‘rotoing’. This is the process of cutting someone or something out of a more complex background to use them in another way. For example, you might want to put a VFX explosion behind your actors as they walk away from it towards the camera. You would need to rotoscope them out of the shot so you can place the explosion behind them but in front of the background scenery.


SFX

Special effects. While these aren’t visual effects, it’s worth defining how the two are different. While visual effects are digitally created assets, special effects are real effects done on set – for example, explosions or stunts. It can also include camera tricks or makeup. People often confuse SFX and VFX.


Texturing

When 3D models are first created, they are just blank shapes with no realistic details on them. Texturing is a process which is akin to painting the model – giving it a skin or surface.


Tracking

Tracking is the process of determining the movement of objects in a scene (relative to the camera) by analysing the captured footage of that scene. 2D tracking is dependent on tracking points in the image. These can be tracking markers placed there or points on objects being tracked. 3D tracking  – also referred to as match moving – is the process of extracting the camera move from a live action plate in order to replicate it in a computer generated (CG) environment. A match move is often created by hand, whereas 3D tracking is done with specialist software. 3D tracking is used to recreate the movements of a camera in a digital space. So, for example, you have a shot that pans from left to right. When you add in your 3D asset, it needs to move from left to right in the same way at the same speed so it looks as if it was actually there.


VFX

VFX stands for ‘visual effects’. It is a very broadly used term used to describe just about anything that cannot be captured through standard photographic capture


Speaking of which, it’s time to end another entry in our VFX for dummies series. We hope this has helped you understand the often complex world of VFX. There’s more to come in the series so check back regularly. Next time, we’ll discuss how to plan your CGI elements to make filming your TV show that much easier.

We know VFX can be confusing to even the most experienced industry veteran. But at REALTIME, we make the process as stress-free and easy as possible. If you need CGI elements in your upcoming project, get in touch with me on [email protected] to see how we can help.

TV VFX for dummies: what are 3D VFX?

We are in a golden age of visual effects. CGI visuals have never been more in demand. Your expertise in the industry may lie elsewhere so you might not realise the actual breadth and depth of what a VFX supplier like us can provide.

3D VFX are more than an alien invasion or a superhero fight. VFX is a multi-faceted process, one that we will break down over the course of our ‘CGI for dummies’ series! With our three-part adaptation of War of the Worlds looming, we couldn’t think of a better time to dive into the world of 3D visual effects for TV.


What is VFX for TV shows?

At its most basic, visual effects (VFX) are the imagery created, altered, or enhanced for a production. They accomplish that which cannot be done during live-action shooting. They aren’t to be confused with special effects (SFX) which are usually done on location during filming. Explosions are a common example, though they are also being replaced by digital recreations as these are safer and cheaper.

On a large scale, they can create the impractical or impossible, such as new background environments, props such as planes, trains, or boats, or life-like animals and creatures. But they are also frequently used for small, simple fixes and to save time and money.

As we said, they aren’t limited to your big-budget action flicks. Today, you’ll be hard-pressed to find a movie, TV show, or advert that doesn’t use VFX in some way. In the coming months, we’ll be covering everything VFX. Here’s what you can expect in our upcoming series.


Demystifying industry terms

Like any industry, the VFX sector has its own dictionary of jargon. It can make the VFX process seem like a Gordian knot, but every term has a simple definition. In this blog, we’ll break down the ABCs of VFX in an easily digestible way. You can learn terms like keying, which is where you replace the green from a green screen with whatever background you like.


How to plan your CGI elements

Creating your CGI elements is one thing; planning them is a whole other process. From concept art to pre-visualisation, we’ll guide you through the process of planning the integration of your assets. You can’t expect to direct your show if you don’t know where your assets will be and when. Look out for our simple step-by-step guide in the future.


Asset building

This might be the first thing you think of when you think ‘VFX’ – creating 3D assets for the production. You can create anything you can think of: from a squadron of planes to a giant three-legged machine and a simple crate, whatever you need. But even this aspect has multiple parts to it. We’ll save the details for a future blog, so keep your eyes peeled.


Particle effects

3D modelling can cover even the tiniest details, including particles like smoke or dust. Particle effects – or particle systems – are made up of tiny particles that, when combined, create the illusion of a greater entity. They will also have their own ‘lifespan’ of sorts, so you can realistically create something like embers in a fire or droplets of rain. The smallest details can make the biggest difference, so look out for a blog on this in the future.


2D vs 3D

If you read 2D and thought we were talking about animated cartoons, then this blog will be for you. Because when we say 2D, we’re talking about visual effects that can be achieved in a 2D space, as opposed to a 3D one. For example, your backgrounds might be 2D matte painting backdrops placed behind your actors. While 3D VFX are great, you can achieve an awful lot more cost-effectively with 2D VFX. We’ll dive into this topic more in a future blog.


CGI vs practical effects

How do you know when to use practical effects or CGI? Is a practical explosion better looking than a CG one? Hopefully, we’ll be able to break down the pros and cons of both for you, so you can figure out how to save yourself time and money during production. Look out for that blog in the near future.


Creating realistic, seamless 3D visual effects takes time and effort. Over the coming months, we hope you’ll find a new appreciation for this art. Check back regularly for another taste of the world of VFX. We hope to see you soon!

At REALTIME, we have the staff and expertise to carry out everything we just talked about. So if you have an exciting project in the pipeline and would like to discuss your visual effects needs, please get in touch with me at [email protected].